DIY Star Tree Topper: 6 Easy Ways + Size Chart by Tree Height
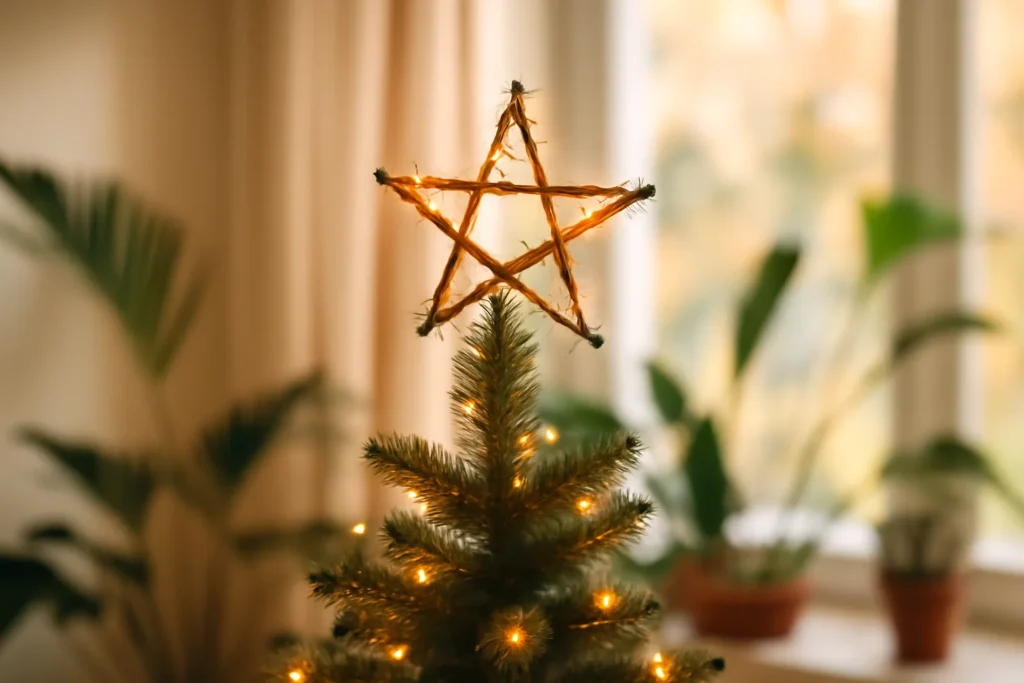
A tree topper star should be about one eighth of the tree’s height (12 to 30 cm, or 5 to 12 in, wide), light, and held by a cardboard cone that slips over the tip: that cone is what keeps it from leaning. You can make it in six simple ways: cardboard covered in gold paper, folded 3D paper, felt, wooden sticks, dried branches, or wire wrapped in fairy lights.
Anyone who has finished a tree knows the moment: someone climbs the step stool, the star goes on, and it flops sideways or bends the top like a fishing rod. It’s almost never the star’s fault. It’s the weight or the missing sleeve, and both are easy to fix before you start cutting.
Below you’ll find the sizing chart by tree height, how to attach the star so it doesn’t tip over, step-by-step instructions for all six designs, a side-by-side comparison, and safety tips for a lighted star.
What Size Star for Your Tree: About 1/8 of Its Height (Chart)
A tree topper star looks proportional when it’s about one eighth of the tree’s height. A small star disappears at the top, and one that’s too big weighs down the tip and makes the tree look lopsided.
| Tree height | Star width | Designs that work best |
|---|---|---|
| Up to 60 cm / 2 ft (tabletop tree) | 8 to 10 cm (3 to 4 in) | Felt, 3D paper, popsicle sticks |
| 1.2 m / 4 ft | 12 to 15 cm (5 to 6 in) | Cardboard, 3D paper, felt |
| 1.5 m / 5 ft | 15 to 20 cm (6 to 8 in) | Any design |
| 1.8 m / 6 ft | 20 to 25 cm (8 to 10 in) | Cardboard, sticks, branches, wire |
| 2.1 m / 7 ft or taller | 25 to 30 cm (10 to 12 in) | Lighted wire, branches, double-layer cardboard |
To check before you start, cut the star out of plain paper, tape it to the top and look at the tree from about 3 m (10 ft) away. Adjust the size on paper, which is a lot cheaper than redoing a finished star.
How to Attach the Star So It Doesn’t Tip Over: Use a Sleeve, Not Glue
A tree topper star needs a sleeve on the back, not glue on the tree. The simplest sleeve is a cone of poster board or a paper towel tube attached to the back of the star with hot glue or strong tape.
- Poster board cone: roll a quarter circle with a 20 cm (8 in) radius, adjust the diameter to fit the tip of your tree and glue it to the lower part of the back of the star.
- Paper tube: cut a 10 to 12 cm (4 to 5 in) piece of paper towel tube and glue it vertically behind the star, with half of it sticking out below.
- Wire coil: wrap craft wire around a broom handle to make a spring, then attach the star to the top of the coil.
- Real tree or thin tip: tie the sleeve on with two or three twists of coated wire, without squeezing the living tip.
Put the star on once the lights are strung and before the ornaments go on, so you can tuck its wire or sleeve neatly behind the top branches.
Paper, Cardboard and Felt Stars (the Lightest Options)
Paper, cardboard and felt stars are the lightest and the easiest to add sparkle to. They all start from the same five-point template: draw a circle, mark five points every 72 degrees around the edge, and connect each point to the second point after it without lifting your pencil.
1. 3D gold cardboard star
Cut two identical stars from box cardboard and cover them with gold metallic paper. On one, cut a slit from the top point down to the center; on the other, cut from the bottom notch up to the center. Slide one into the other in a cross, and the star stands on its own with depth on both sides. It takes about 40 minutes and puts boxes that would have gone in the recycling bin to good use.
2. Faceted folded paper star
Use poster board or cardstock. Cut out two identical stars and, on each one, score a line with a ruler from every point to the center and another from every notch to the center. Fold the point lines up and the notch lines down: the star takes on facets. Glue the two halves back to back, with the sleeve in between.
3. Stuffed felt star
Cut two felt stars, sew the edges together with a blanket stitch, leaving an opening, and fill with polyester fiberfill. Close it up and decorate with sequins or embroidery. It’s the safest option for homes with small children and cats, because it doesn’t break and has no hard points.
Wood, Branch and Light-Up Stars (Rustic or Glowing)
Wood, branch and wire stars give the top of your tree a rustic or glowing look. They all use the same logic: five equal sticks crossed over each other form a five-point star almost as wide as each stick is long.
4. Wooden stick star
Popsicle sticks make a star about 11 cm (4.5 in) wide, good for tabletop trees. For bigger trees, use 25 cm (10 in) bamboo skewers, which form a star just under 25 cm across. Hot-glue the ends, paint it gold and wrap it with twine or a strand of fairy lights.
5. Dried branch star
Choose five straight, dry branches, 20 to 25 cm (8 to 10 in) long, and tie the ends with sisal twine, wrapping three times at each crossing. Leave the branches in the sun for two days first to make sure they’re dry and free of insects. It suits rustic decor and costs next to nothing.
6. Wire star with fairy lights
Bend aluminum craft wire into a star shape, twisting the ends to close it. Wrap a 1 to 2 m (3 to 6 ft) battery-powered micro LED strand around the wire and tape the battery pack to the back. At night, this is the design that stands out most.
Which Star to Make: the Six Designs Side by Side
The best star depends on how much time you have, your decorating style and who lives in your home. The chart sums up the differences.
| Design | Time | Weight | Durability | Style |
|---|---|---|---|---|
| 3D gold cardboard | 40 min | Light | 2 to 3 seasons | Classic |
| Faceted paper | 30 min | Very light | 1 to 2 seasons | Modern |
| Stuffed felt | 1 hr 30 min | Very light | Many years | Sentimental, kid-friendly |
| Popsicle sticks or skewers | 30 min | Light | Many years | Rustic, colorful |
| Dried branches | 40 min, plus 2 days of drying | Medium | 2 to 3 seasons | Rustic, natural |
| Wire with fairy lights | 45 min | Light | Many years (with battery changes) | Glowing |
The materials cost very little and usually come from things you already have around the house. If you like the handmade look, the same supplies (cardboard, felt, twine and branches) can carry the rest of your tree decorations in the same spirit.
Safety Tips for a Lighted Star: Battery LEDs Are the Easiest
A lighted star is the only one that calls for electrical care, because it sits at the top, close to branches and paper ornaments. The simplest way to avoid risk is to use battery-powered LED lights, which stay cool and don’t need a cord running to an outlet.
- Plug-in lights: check the label before you buy. It should show the manufacturer or brand, the voltage and the maximum wattage, and in the US look for a UL or ETL safety mark. Make sure the lights are rated for your home’s outlets.
- Hidden cord: run the cord down the trunk, behind the branches, without pulling it tight or bending it at a sharp angle.
- Batteries: keep the battery pack closed and out of reach of small children.
- Switch off: turn the lights off when you leave the house and when you go to bed.
- No candles: never use an open-flame candle on the star or near it.
A star for a summer Christmas
If Christmas falls in the hot months where you live, as in Australia and New Zealand, a star that sits near a sunny window gets more heat than you’d expect. Hot glue can soften in a very warm spot, so back up the sleeve with a few wraps of twine or tape, keep battery packs out of direct sun, and favor felt, wood or wire over paper that may curl in humid air.
The most common mistake is making the star first and the sleeve last. Test the sleeve on the tip of your tree before decorating the star, and the rest is just the fun part.
May your star go up straight on the first try, with the whole family watching from the couch.
Frequently Asked Questions
What if the top of the tree bends under the star?
Switch to a lighter design, like paper, felt or thin wire. Another fix is to tie a bamboo skewer to the tree’s trunk as a hidden stake to support the star’s sleeve.
How can I make the star sparkle without lights?
Cover the star with metallic paper, apply glitter with white glue or glue on sequins. Placed near the tree lights, it will reflect their glow.
Do you have to put a star on top of the tree?
No. A star is the most common tradition, but a large bow, an angel, a bundle of gold branches or no topper at all also work, depending on your home’s style.
How do I store the star for next Christmas?
Store the star in its own sturdy box, with tissue paper around the points. Lighted stars should be stored without batteries to prevent leaks over the year.